- Create
- Community
- Blog
- About

How to Paint Window Frames Black
 by Lisa Bonanno|Sep 21, 2021
Hello friends,
Many of you know that we recently purchased a home in Florida and we are in the process of renovating it. We’ve hired a company to help us with the renovation and so far it’s really coming along. The popcorn ceilings have been removed and the ceilings are now painted. The kitchen and baths have been gutted and they have patched areas with drywall. This week they should be tiling the bathrooms and then next week, the flooring will be going in. Wow! It’s fun seeing it all come together!

Before the flooring goes in, I decided to paint the window frames black. I love the look of black window frames and they will add a modern contrast to the house. We are planning to replace these windows so this will be a temporary fix until we get new ones.
Disclaimer: I’m not a professional when it comes to windows and climate. I did lots of research for the FL area to find out what products to use that will hold up in the heat and humidity and I think this will work in colder climates - but you will need to research this before you try this project. Also, my windows are metal. The product I’m using does say it works on plastic (vinyl) but you may want to test it first.
Here are the windows before:

Supplies that you will need:


Step 1:
Clean your windows really well! I cleaned both the insides and out. I also cleaned the window sills and grilles really well.
Step 2:
Use Frog Tape and go around your windows. It is important to make sure the tape is straight and tight to the window so that the paint will not bleed through. I went around my grilles, too. (BTW: My grilles are on the outside of the window but most newer windows have them on the inside.)

Step 3:
Now use plastic to cover the areas that you do not want to get painted (ex. floors, walls, glass part of windows).
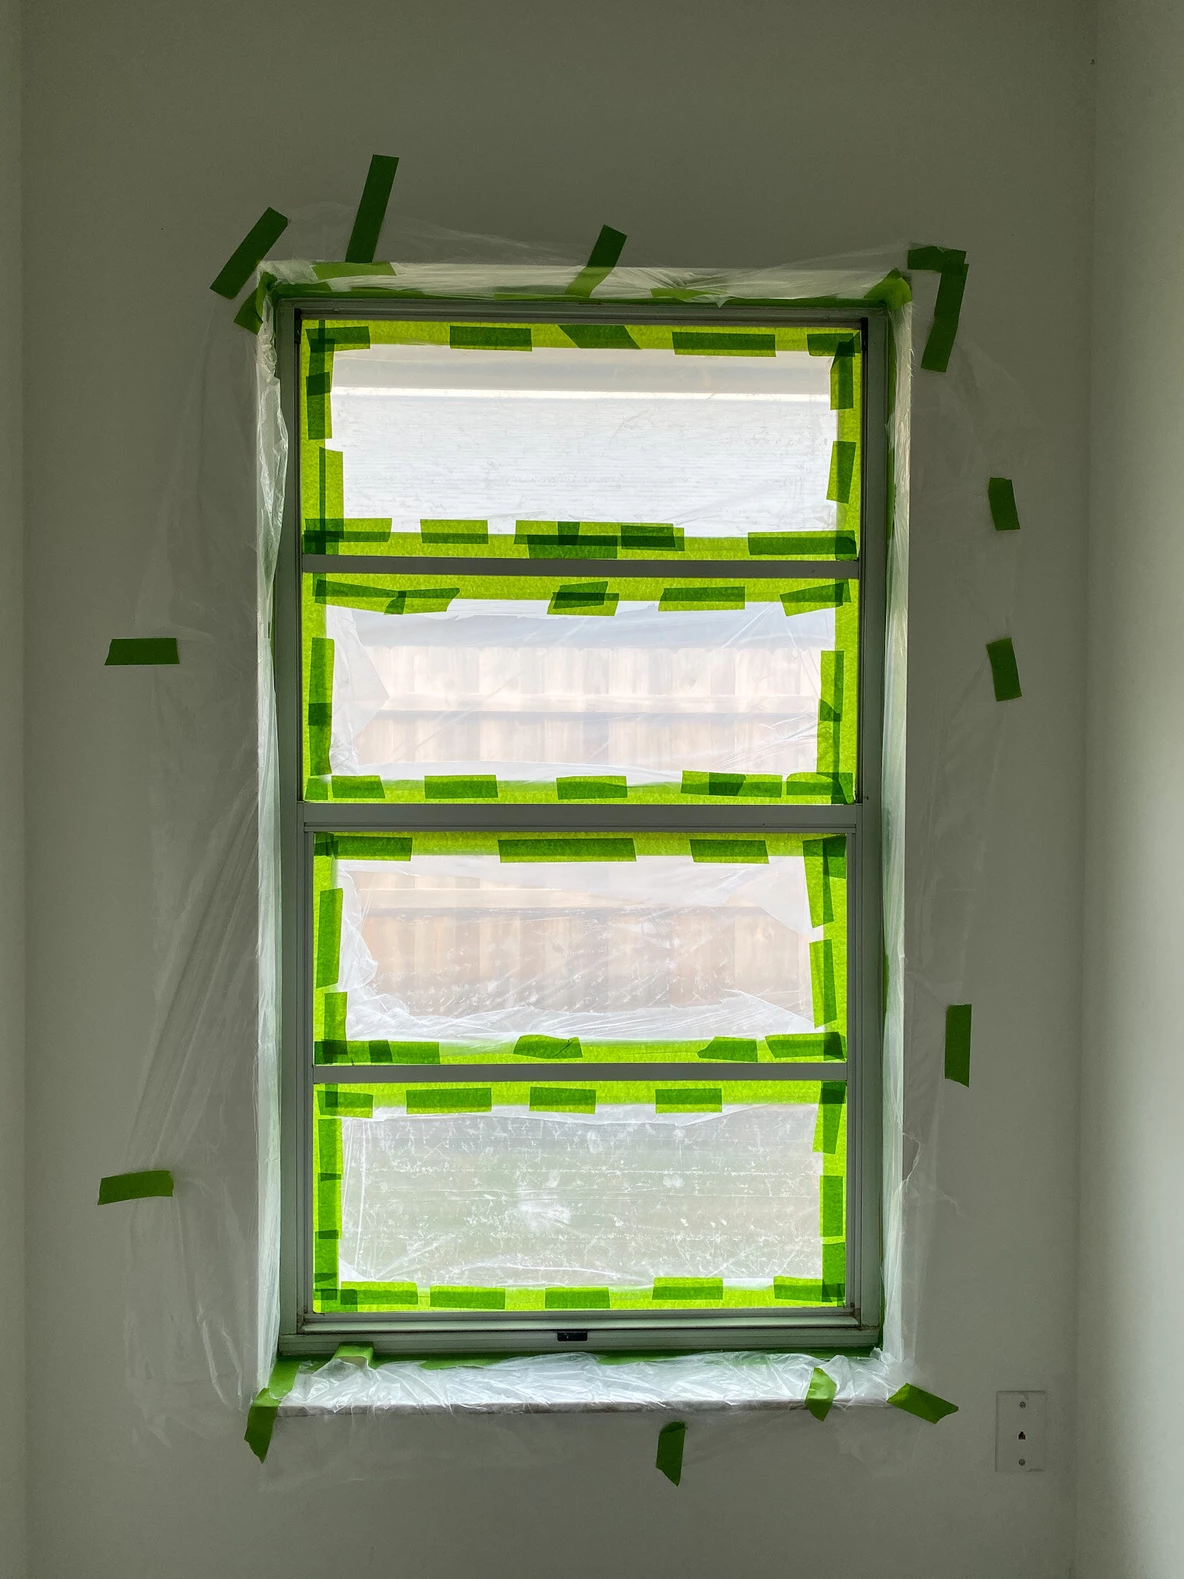
I went to several stores (Lowe’s and Home Depot) and neither store had the type of plastic with tape already on it. However, a few days later (after I did the window above) I did find some at another Lowe’s in town. Here is the plastic that I would recommend using:

It has tape on one side that you will adhere to the Frog tape that you can cut to size. It is great because the plastic really covers the window well. Here is another window that I used with this tape:

Step 4:
Make sure the tape is secure!
I recommend taking your finger and going around the entire window again - just to make sure the tape is secure. You want sharp lines with no paint bleeding through.

Step 5:
Time to paint!
Shake the paint can (for at least 1-2 min) before starting. Also, you may want to test it to make sure it comes out well before starting to spray. I went outside and practiced on a piece of cardboard.

Use 2-3 light coats of paint vs. 1 heavy coat.
Wait for 15 min. in between coats to make sure the paint is dry. (It will dry quickly!)

Make sure the paint is dry before removing the plastic.

Step 6:
Remove the plastic and tape. This is the most exciting part!

Wow! What a difference!
Before:

After:

Thanks for joining me as I share how I painted my windows. Let me know if you have any questions!
This article was written by Lisa from Cottage Style
Meet The Author
This is Lisa. She enjoys seeing transformations- in people (first and foremost) and in things that are discarded (like furniture and homes). Her passion is seeing the forgotten and neglected come to life!
She hopes to inspire you with what she's learned (and is continuing to learn) about decorating as she highlights the projects in her home and Airbnb properties.


Socialize


 21h left


